How to install the 24″ Color Changing Colorfalls Project Bundle
Items needed
Tools needed
Markout paint
Tape measure
2-ft level
4-ft level
A straight 2×4
Wheelbarrow
Shovel
Tamper
Lump hammer or mallet
Grinder or chisel
A large wrench (Channellock 16.5″ tongue and groove pliers)
Screwdriver or nut driver
Tubing cutters or PVC saw
Most stone manufacturers recommend setting their stones on a 4″ bed of tamped sand, stone dust or screenings. You’ll need about 8 ft³.
For the hardscape
You will also need your hardscape stone and the manufacturer’s recommended construction adhesive. Flexible Basins are sized to accommodate the most common engineered stone dimensions. For this installation we installed the Color Changing Colorfalls Project Bundle to an already existing wall and used a trapezoidal block curved wall solution by Belgard but, you could also create a rectangle enclosure.
Step-by-Step Guide
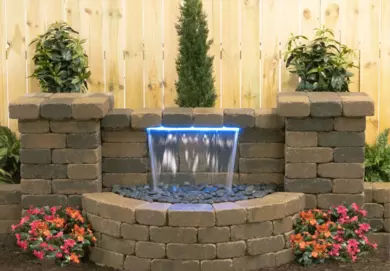
Create a water feature with ease with the Color Changing Colorfalls Project Bundles! These project bundles include all the components you need, ready to be assembled into the water feature of your dreams using your choice of stone. With two people, it should take less than a day to install. We show you how to complete this water feature, step by step: preparing the base, building the structure, installing the plumbing and capping the columns.
The only exception to our videos is that we dry stack the block, you’ll be gluing your blocks together with construction adhesive according to the manufacturer’s guidelines.
1. Preparing the base
If you’re starting from scratch, prepare the base by digging out a 4′ x 6′ area, about 6″ below final grade. Tamp the subsoil and then add 8 to 10 ft³ of screenings or damp sand. Tamp again and carefully level the base to about 2″ below grade.
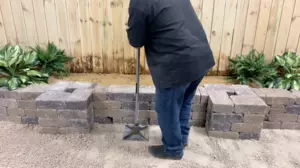
To demonstrate how versatile the Color Changing Colorfalls Project Bundle is, we added the bundle to an already existing wall.
If you’re also starting with an existing wall, remove the soil to a depth of about 2″ below the bottom of the wall. Tamp the subsoil and then add the screenings and tamp again. Carefully level the base to end up at the same level as the bottom of the existing wall.
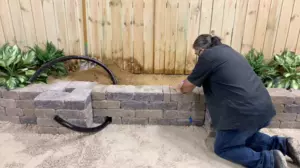
2. Building the reservoir
Pass a length of 1.5″ flexible pipe from the bottom of the wall to the back side, about 8″ in from the left corner. We removed a section of block but, you could also dig the pipe under the wall or drill through the wall with a 2″ core bit.
If you’re installing an autofill, which is strongly recommended, pass the fill line through or under the wall about 8″ from the right corner at the same time.
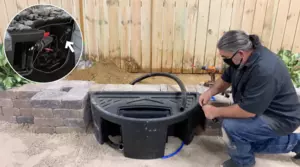
3.a. Installing & plumbing the basin
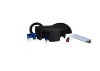
Set the Formal Spillway Basin in place to check that the pipes fit in the molded channels in the bottom of the basin. Then, install the plumbing. It is easiest to install the plumbing before installing the block surround.
Drill a 0.875” hole in the basin, where indicated, for the Autofill. Remove the retaining nut on the Autofill, leaving the washer in place, and apply 3 to 4 turns of sealant tape to the threads. Insert the Autofill into the basin from the inside out and reinstall the retaining nut. Then, thread the 0.5” funny pipe adapter onto the Autofill and push the funny pipe onto the barbs of the adapter.

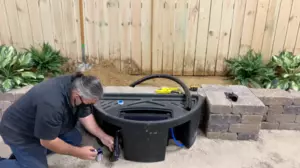
3.b. Installing & plumbing the basin
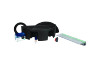
Disassemble the single union valve and apply 3 to 4 turns of sealant tape to the threads of the male end with the retaining ring. Install the male end of the vale assembly into the bulkhead fitting, making sure the retaining ring is in place. Install a male thread adapter to the outlet of the pump. Then, glue in the 90° elbow. Glue the nipple into the elbow and glue the valve to the nipple. Reassemble the valve to complete the plumbing inside the basin
Refer to the included instructions provided in the box as needed.
3.c. Installing & plumbing the basin
To finish the plumbing outside of the basin, apply 3 to 4 turns of sealant tape to the threads of the threaded elbow and install in the outside of the bulkhead fitting, oriented downward. Cut a 6″ length of pipe and glue it to the remaining 90° elbow, then glue the other end of the short pipe to the threaded elbow that’s connected to the bulkhead fitting. Finally, glue the bottom elbow into the pipe that’s going into the wall.
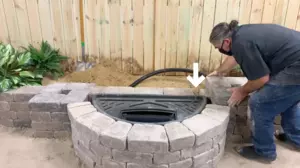
4.a. Building the reservoir walls
Atlantic’s Formal Spillway Basins accommodate most engineered stone dimensions without cutting. We used a curved wall solution by Belgard for our installation but, you could also create a rectangle enclosure.
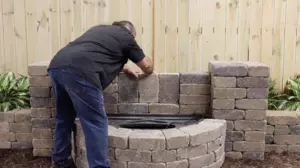
Set the first course of block around the Formal Spillway Basin, then bond the next course of stone with adhesive. Follow manufacturer’s recommended adhesive and adjust or cut as needed. Build up and finish the four wall courses to 16″ tall.
You will eventually need to remove the pump for service or replacements so, you must make provisions for the cord at this time in your construction. In the back wall, cut a groove or leave a space large enough for the plug of the pump to pass through the back of the wall either in the fourth course or between the fourth and fifth course.
4.b. Building the reservoir walls
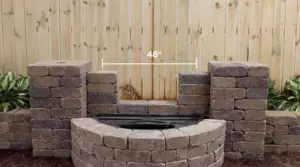
Build the back wall up another course and the columns up another five courses. Carefully measure to leave 48″ between the columns. In the space between the columns, stack the outer stones flat, leaving space for three vertical stones.
4.c. Building the reservoir walls
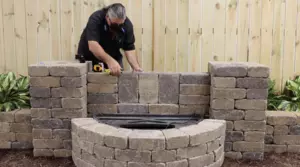
Before installing the three vertical stones, cut 0.5” off of the long dimension to make each 11.5” long. Set them side by side, broad side to front, in the center of the wall, 1″ back from the front edge. This will create a relief panel and a 0.5” deep notch for the lip of the Colorfalls.
4.d. Building the reservoir walls
Be sure to support the body of the Colorfalls behind the three vertical stone wall. We used extra wall block to support the body of the Colorfalls.
5. Install the Colorfalls
To install the Colorfalls, apply 3 to 4 turns of sealant tape to the threads of a male adapter and install it in the center inlet of the Colorfalls. Test the Colorfalls for fit in the 0.5” notch then, measure and cut a 1.5” piece of flexible pvc pipe. Glue the short pipe into the elbow and install the elbow into the male thread adapter. Finally, glue connections to the long supply pipe to complete the plumbing.

6. Finishind touches
To secure the Colorfalls, apply silicone, NOT permanent adhesive, to the front lip and block the Colorfalls is seated on. The silicone will allow you to remove the Colorfalls in the future if desired. Apply silicone, not adhesive, to the top of the Colorfalls and secure it with capstones to complete the center wall. Then, cap the columns with 6 blocks each. Measure to ensure the overhang is even all the way around.
Fill the Formal Spillway Basin until the autofill float rises. Check for proper function and adjust as necessary. Then, cap the pump chamber and install the splash mat.
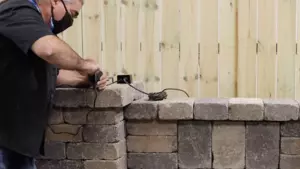
7. Connections
Apply a dab of the provided dielectric grease to the plug of the Colorfalls and securely tighten to the outlet of the InfiColor Module. Apply another dab of dielectric grease to the plug of the Module and connect securely to the transformer. Plug in the Module and test. You’re now ready to program your InfiColor Color Changing Colorfalls. See manual for details if needed.

8. Smart Connection
Download the InfiColor App on your smart phone or tablet. Available on the Apple App Store and Google Play, this app will allow you to fully customize the lighting colors and sequences for your Color Changing Colorfalls.